What is Infrared Photography? 3-Step Guide for Beginners in Infrared Photography
Taking photographs, whether for our personal memories or for some reporting work or for any historical, political, or travel purpose is a centuries-old activity undertaken with keen interest and passion by individuals.
This field is something that has seen various verticals come out, meriting their existence in accordance with the changing times, improvement in technology, and advancing techniques and strategies. Out of all the methodologies, one of the new ones that have taken this field by storm is Infrared photography.
What is Infrared Photography?
Basically speaking, in this type of photography the image sensor or the film that is used for image capturing is sensitive to infrared light. There is a specific wavelength used for photography and the spectrum is near-infrared, the domain of thermal imaging.
Technical Aspects of Infrared Photography
This type of photography can be assumed to be used for exploring the unseen world. This method is about exploring what lies beyond the ‘visible spectrum. Every object reflects Infrared light. And herein, the images capture reflected Infrared light in unique proportions pertaining to the object captured which showcases objects in a completely different way that we are used to seeing.
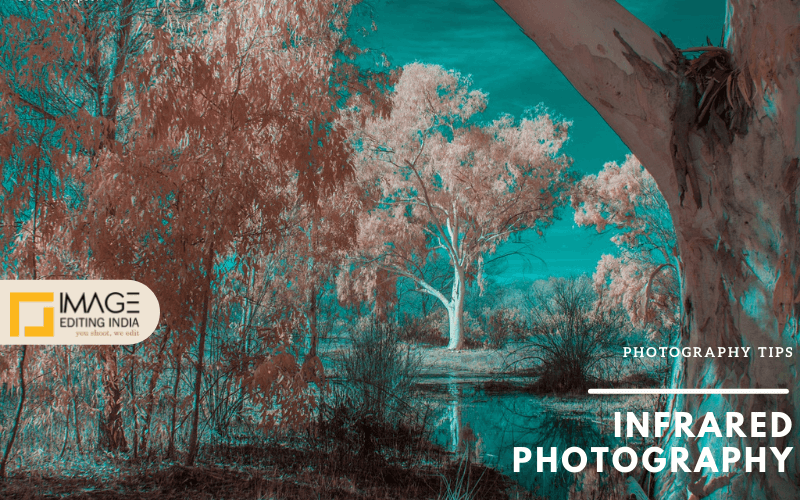
The light qualities are also diverse and different. Skin looks milky and smooth, any vegetation looks near white or white, black clothing looks white or gray, eyes look ghostly, blue sky looks very dramatic, and Infrared light when passes through sunglass appear dark.
Infrared photography images provide magic, as these give an effect to nature even more interesting than black and white images. Infrared photography also provides a unique crispness to the images and this technology requires special films to be used.
Types of Infrared Photography
There are two types of Infrared Photography
Analog -
It requires the films to have stray light sensitivity, and when taking the photos there should be a mechanical frame counter in the camera.
Digital -
This is a more popular and prevalent type of Infrared photography. The sensors used in this are highly sensitive to infrared radiation.
Applications of Infrared Photography
Alongside the popular HDR and digital photography methods, Infrared is also gaining in presence simply because of the dramatic and interesting effect and result that it delivers. The applications of Infrared Photography are wide, and there are some aspects where it is considered the best:
- Capturing images in the darkroom
- Wildlife photographers use this for capturing night-time snaps
- When there is clear light, indoors or outdoors, you can add a chalky appearance
- Apart from these, Infrared Photography can be used in all other aspects of photography to get a fascinating capture finish
Beginner’s Guide to Infrared Photography
1. Arrange the Gears
Your passion for this photography starts with arranging the equipment and devices:
•Infrared Filters
This is the best initial step for photographers. These filters enable the infrared light to hit the camera, while also disallowing the visible light to do such. From slide-on to screw-on there are many filter systems you can try out, and this isn’t much expensive an option to try at first.
•Infrared Film
This type of film is also popular, especially in film photography. However, you would need access to a lab that can develop such films.
•Infrared Camera
This method is having a dedicated infrared camera. This is an expensive option but is more suitable if you want to approach infrared photography professionally. Your DSLR camera when converted removes the infrared blocking filter.
2. Adjust Camera Settings
• JPEG and RAW Format
These are two options for starting out. RAW images taken with a DSLR provide high scope for processing. However, identifying those pinkish-red RAW files are good or not come with time and experience. JPEG option results in more differentiation and provides scope for more settings adjustment.
• White Reflection Balance
Amongst all the aspects, white balance is one of the most important ones. Approaching the manual setting of your camera, custom adjusts the white balance.
• Exposure
For the desired result, you have to have knowledge about exposure times. When using infrared filters there won’t be any need for long exposures. While using a converted camera, you will have to adjust your normal exposure settings that is dependent on the amount of light.
3. Post Processing
• Channel Swapping
When you want to get those blue skies, channel swapping becomes an all the more important functionality. But there are different ways as to what channels need to be changed and to what values. You can try changing all the channels, or only red and blue channels, there are other changing options as well.
• Auto-Tune
RAW images deliver a dull pinkish red texture. You can try various infrared processing methods, and the most popular one is to import the image into Photoshop and then apply Auto-Tune feature.
• Finalizing the Image Processing
Using Photoshop you can adjust your curves and levels, along with adjusting hue/saturation. This depends on your personal preference. Then, black and white infrared is another thing that you can explore more.
Conclusion
Infrared photography is a not very old concept, but one that is exhilarating and worth trying out for professional photographers as well as for those who are passionate about photography, or those who want to try out something new and inspiring in their captures. After photography, if you feel that your photographs need some photo editing experts, there are too many options available.
